

Backup & Restore Outlook Express
How to back up Outlook Express items
Step 1: Copy message files to a backup folder
Step 2: Export the Address Book to a .csv file
Step 3: Export the mail account to a file
Step 4: Export the newsgroup account to a file
How to restore Outlook Express items
Step 1: Import messages from the backup folder
Step 2: Import the Address Book file
Step 3: Import the mail account file
Step 4: Import the newsgroup account file
How to preserve the Blocked Senders list and other e-mail rules
SUMMARY
This article describes how to back up and to restore the following items in Microsoft Outlook Express:
• Messages
• The Address Book
• Mail accounts
• News accounts
If you use multiple identities in Outlook Express, repeat the steps in the “More Information” section for each identity, and separate the backup data accordingly. This process will make it easier to restore each identity.
This article is intended for a beginning to intermediate computer user.You may find it easier to follow the steps if you print this article first.
Back to the top
MORE INFORMATION
How to back up Outlook Express items
Step 1: Copy message files to a backup folder
Step A: Locate the Store folder
1. Start Outlook Express.
2. Click Tools, and then click Options.
3. On the Maintenance tab, click Store Folder.
4. In the Store Location dialog box, copy the store location. To do this, follow these steps:
a. Put the mouse pointer at one end of the box under the Your personal message store is located in the following folder box.
b. Press and hold the left mouse button, and then drag the mouse pointer across the Your personal message store is located in the following folder box.
c. Press CTRL+C to copy the location.
5. Click Cancel, and then click Cancel again to close the dialog box.
Step B: Copy the contents of the Store folder
1. Click Start, click Run, press CTRL+V, and then click OK.
2. On the Edit menu, click Select All.
3. On the Edit menu, click Copy, and then close the window.
Step C: Create a backup folder
1. Right-click any empty area on your desktop, click New, and then click Folder.
2. Type Mail Backup for the folder name, and then press ENTER.
Step D: Paste the contents of the Store folder into the backup folder
1. Double-click the Mail Backup folder to open it.
2. Right-click inside the Mail Backup folder window, and then click Paste.
Step 2: Export the Address Book to a .csv file
Important Make sure that you follow this step if you use multiple identities in Outlook Express.
Microsoft Outlook Express 5.x and Microsoft Outlook Express 6.0 use a Windows Address Book (.wab) file to store Address Book data. The individual data for each identity is stored in a folder by user name within the .wab file that is used.
The only way to separate the Address Book data for different identities is to export the data to a .csv file while you are logged in as a specific identity. If the .wab file becomes dissociated from the user identities, the data can be exported only as one total. In this case, the data cannot be exported folder by folder.
There is another reason to export the .wab file to a .csv file. If the .wab file not exported to a .csv file, but the .wab file is shared with Microsoft Outlook, the addresses are stored in the personal folders (.pst) file in Outlook. When you export the file to a .csv file by using the File menu in Outlook Express, the correct contacts are exported. However, if the Address Book is shared with Outlook, you cannot use the File menu option to export from the Address Book. This option is unavailable.
To export the Address Book to a .csv file, follow these steps:
1. On the File menu, click Export, and then click Address Book.
2. Click Text File (Comma Separated Values), and then click Export.
3. Click Browse.
4. Select the Mail Backup folder that you created.
5. In the File Name box, type address book backup, and then click Save.
6. Click Next.
7. Click to select the check boxes for the fields that you want to export, and then click Finish.
8. Click OK, and then click Close.
Step 3: Export the mail account to a file
1. On the Tools menu, click Accounts.
2. On the Mail tab, click the mail account that you want to export, and then click Export.
3. In the Save In box, select the Mail Backup folder, and then click Save.
4. Repeat these steps for each mail account that you want to export.
5. Click Close.
Step 4: Export the newsgroup account to a file
1. On the Tools menu, click Accounts.
2. On the News tab, click the news account that you want to export, and then click Export.
3. In the Save In box, select the Mail Backup folder, and then click Save.
4. Repeat these steps for each news account that you want to export.
5. Click Close.
Back to the top
How to restore Outlook Express items
Note To restore items when you use multiple identities in Outlook Express, you may have to re-create the identities before you follow these steps. Repeat each step as needed for each identity.
Step 1: Import messages from the backup folder
1. On the File menu, point to Import, and then click Messages.
2. In the Select an e-mail program to import from box, click Microsoft Outlook Express 5 or Microsoft Outlook Express 6, and then click Next.
3. Click Import mail from an OE5 store directory or Import mail from an OE6 store directory, and then click OK.
4. Click Browse, and then click the Mail Backup folder.
5. Click OK, and then click Next.
6. Click All folders, click Next, and then click Finish.
Step 2: Import the Address Book file
1. On the File menu, click Import, and then click Other Address Book.
2. Click Text File (Comma Separated Values), and then click Import.
3. Click Browse.
4. Select the Mail Backup folder, click the address book backup.csv file, and then click Open.
5. Click Next, and then click Finish.
6. Click OK, and then click Close.
Step 3: Import the mail account file
1. On the Tools menu, click Accounts.
2. On the Mail tab, click Import.
3. In the Look In box, select the Mail Backup folder.
4. Click the mail account that you want to import, and then click Open.
5. Repeat these steps for each mail account that you want to import.
6. Click Close.
Step 4: Import the newsgroup account file
1. On the Tools menu, click Accounts.
2. On the News tab, click Import.
3. In the Look In box, select the Mail Backup folder.
4. Click the news account that you want to import, and then click Open.
5. Repeat these steps for each news account that you want to import.
6. Click Close.
Dance Party
Wednesday night we met at the Amity building to teach the young men and women some dances. They asked us to come for about 30 minutes and we ended up teaching about an hour and a half. It was a blast because the kids kept asking us to teach them another dance, and they even taught us one as well. Wish we had pictures, but it ended up being a blast!
UPDATE: I will see if any of the leaders can give me some of the pics from their camera. I should have turned on the webcam on my mac the whole time.
Synced Debate Video | Pretty Funny or Scary at the same time
Enabling Remote Desktop…Remotely
I was a trip away from a computer that I needed to work on, so being the lazy bum that I am I figured out how to enable the Remote Desktop Protocl (RDP) remotely. It envoles an optional step of adding a user to the local computer management. It is useful if you need to add Administrator access to a specific user on that computer.
Here’s the dealio:
Add users to local computer groups remotely:
– Launch MMC (Microsoft Management Console)
– Add Snapin – Computer Management (for the remote machine)
– Under System Management -> Local User and Groups -> Groups (add users as needed to specific groups)
Enabling RDP remotely:
– Launch regedt32.exe (can’t use regedit.exe for remote registries)
– Connect to the remote Computer’s Registry
– KEY: HKEY_LOCAL_MACHINESYSTEMCurrentControlSetControlTerminalServerDATA: fDenyTSConnectionsVALUE: 0 = enable Remote Desktop / 1 = disabled
It works like magic, and saves you much time and trips to those pesky remote PCs. This application is mainly for someone on a LAN or through a VPN connection. If you are trying to do this over the regular internets you will have issues.
Wow, the Internet still has good things ocasionally…
Really no words needed, just watch… I about cried.
PHX Trip | October 2008
We had been planning a trip down to the valley for over a month now, and the weekend finally came. We all got together and headed out to RV to pick up dad at the Show Low Arby’s. While eating dinner in Show Low dad noticed there was a nail in the back tire so we had to run back to Future Tire and get it repaired before we headed to the RV v. Payson football game. We ended up talking to Kelli Brown there for the entire first half. (My mom and I donated Gymnastics Season Passes and a Computer overhaul for her husband’s Benefit. I heard from Scott Hall who dropped his computer off last night, and his wife made sure her name was at the end of the list of the silent auction for the overhaul.) The second half Amanda and I ended up sitting by Brian Maughan, Josh Rogers, and Jackson Rogers. It was great to catch up with them.
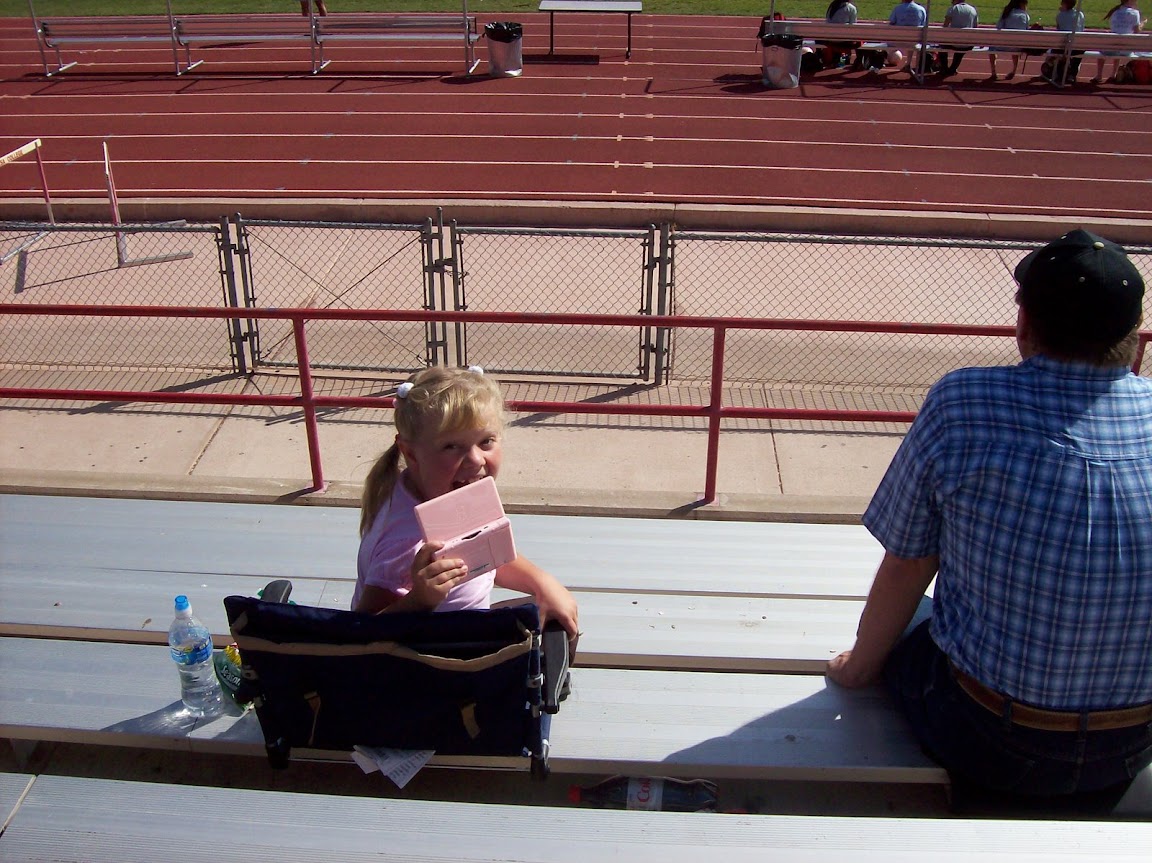
We headed into the valley at about 11pm and crashed in our hotel rooms. The next morning we got up and had some breakfast which was actually really good. At the game I had someone meeting me to buy a new DS for Mylea. Her’s had been stolen at a La Quinta hotel in Albuquerque before school started. I had been looking for a deal since I had worked with them hotel for them to pay for it. She ended up getting a bright pink DS and 11 games for $150.00. Dealcity right there!
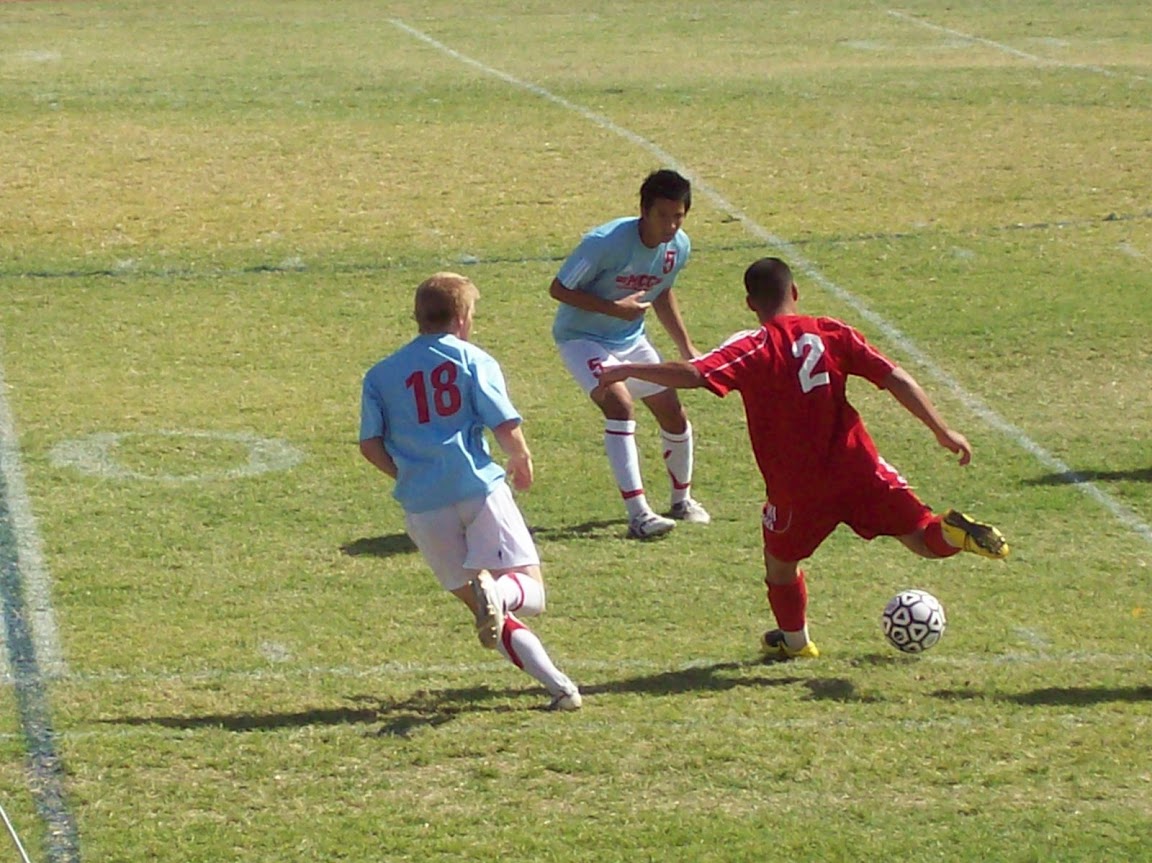
Clancey’s game was very good even though they didn’t win. It was fun to be back at the field watching him. We had mad it to pretty much every game the year before.


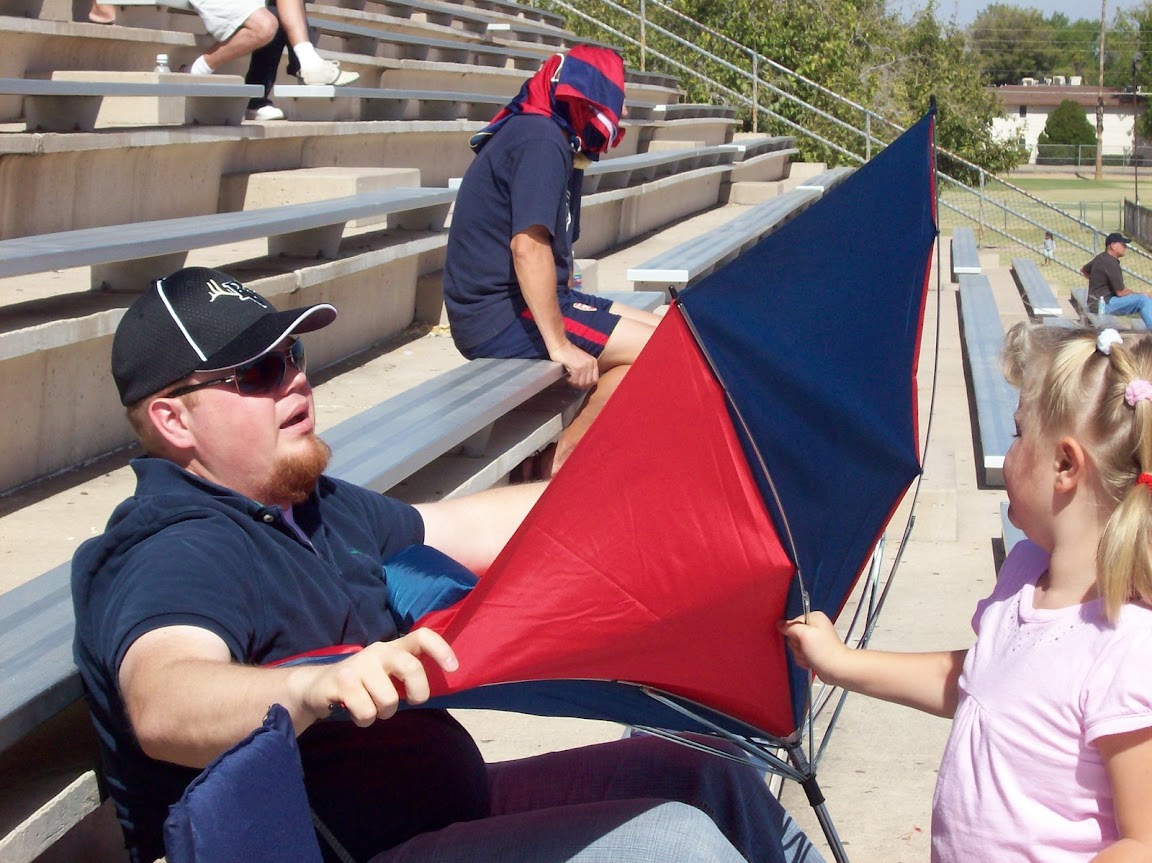 It was kinda windy and our awesome umberellas weren’t in the best shape, but all in all it was a great time. We all went out and had lunch, and after that we went seperate ways and visited Uncle Bob’s, watched basketball games, played putt-putt, went to the mall, and all ended up together at the Football game that night. We headed out of the valley at 1030 and I ended up driving us all the way home. At about 2am we pulled in to the house, unloaded our stuff, and crashed out hard.
About 5 hours later we were up again and getting ready for Church. We had hurried back for it, and I had volunteered to do sharing time so we played Charades with the little kids, and the 25,000 Blessing Pryamid for the bigger kids. It was a blast, and I don’t think i’ve had such a great time at church in a long time.
After we all headed to our house for Carne Asada French Fries and Iron Man. Everyone pretty much fell asleep, and just hung out for the rest of the afternoon. Great weekend!
Which Candidate do you think like?
http://revision3.com/content/elections2008/
this is really cool. fill it out and it tells you who’s side you choose on certain topics. Pretty neat, and it may even suprise you…